


How can I use Personalization of BugerPrints Platform?
Step 1: Create campaign on BurgerPrints Platform.
- Select a product that you want to personalize.
- Upload your design transfered from psd (high quality png, jpg)
- Complete product information such as title, description…
- Lauch product.
Demo:

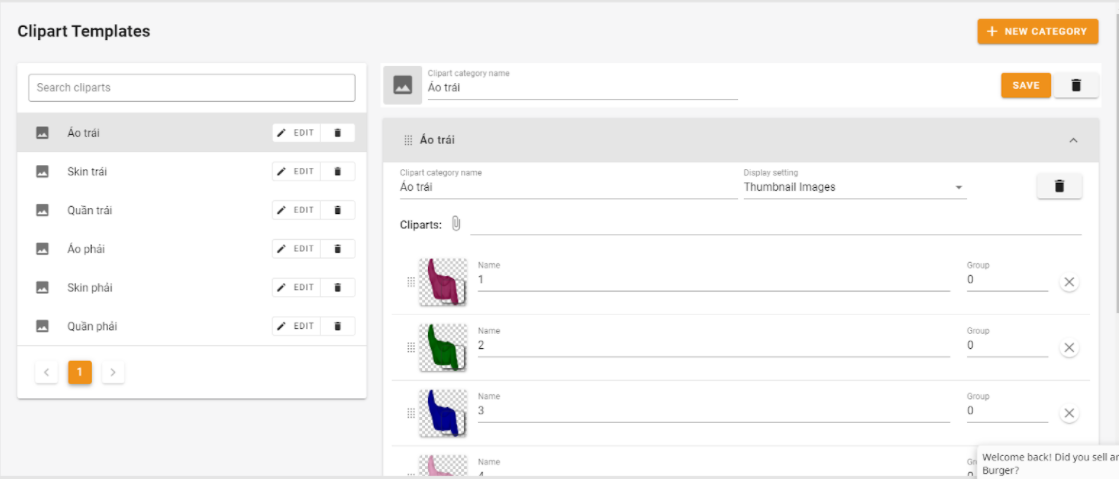
Step 2: Create Clipart
- Click Clipart -> New Category
- Sequentially name and upload personalized layers for not being confused
- Save your clipart. You clipart will be appeared at Clipart Templates.
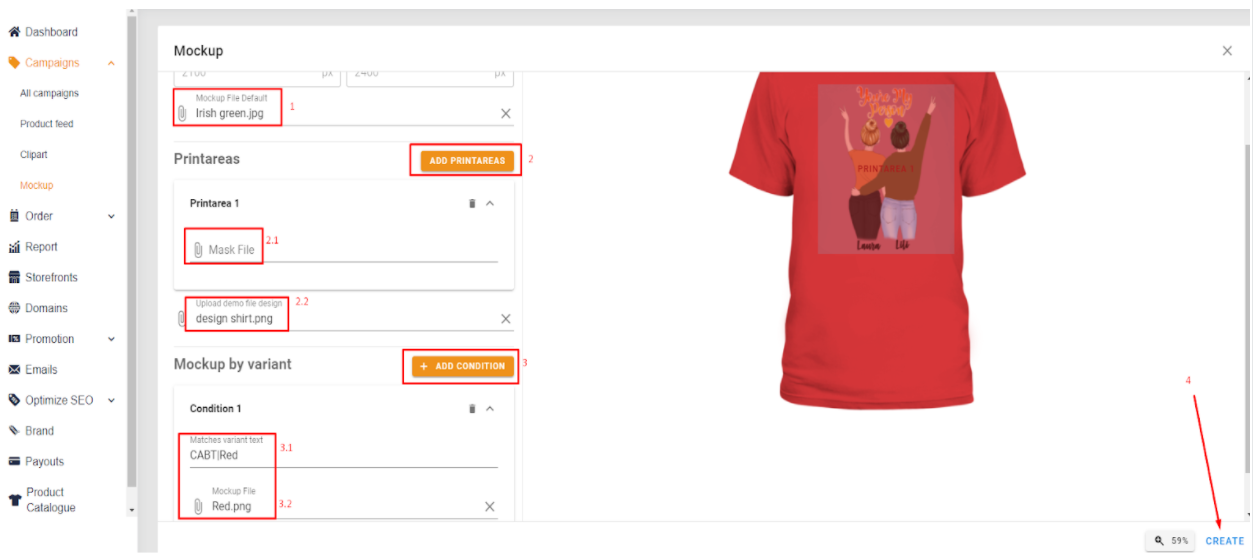
Step 3: Create Mockup
Mockup can be used for several campaigns.
3.1 Click Mockup -> Add Mockup.
+, Printarea Size: Choose the right size for the print area (normally 2100×2400)
+, Mockup File Default: Upload your Product Mockup, with the first color you selected at you campaign. At this step, you can connect to BurgerPrints’s Seller Support to help you with Product Mockup.
Example: You created you Popular Tee Campaign with red color, so Your Mockup File Default must be red too.
3.2 Printarea
+, Mask File: Only need with Mug Product.
+, Upload file demo design: Upload your design transfered from psd (high quality png, jpg)
+, Click to PrintArea and adjust accordingly
3.3 Mockup by variant
+, Add Condition
+, Matches Variant Text: Right format is [ Sourcecode_name]|[Mockup file name]
You can refer to this file to find out Matches Variant Text: https://rebrand.ly/BurgerPrints-PLF-Personalize
+, Mockup File Default
Click to Create -> Successfully create your mockup
Step 4: Edit personalize the campaign
At this step, you comeback to the campaign created at step 1, and click Edit Personalize.
Implement tabs in turn: Options, Layers, Setting, Demo. 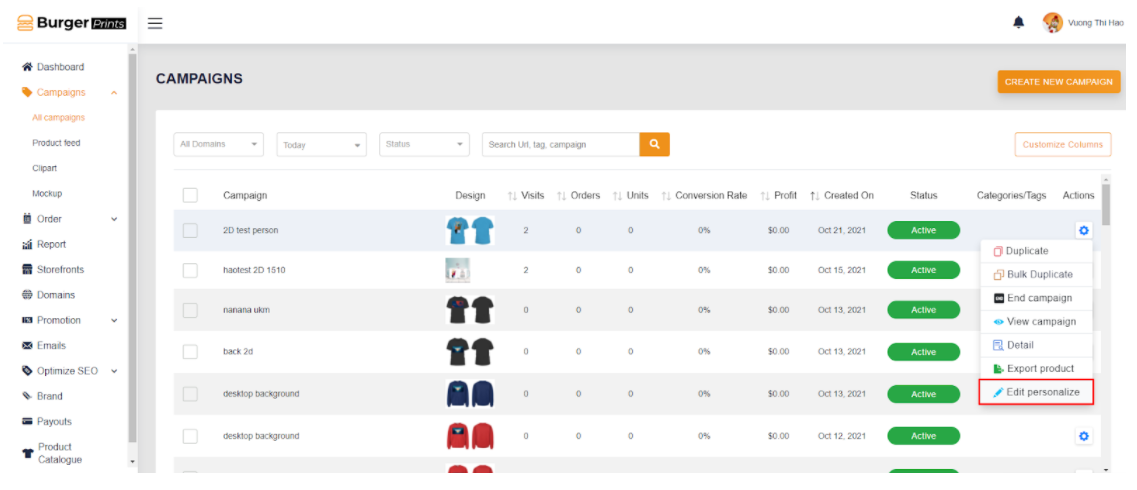
4.1 Options: This is where the seller will create the personalized options that will be displayed on the campaign.
- Clipart: Create personalized options such as hair, clothes, skin…
- Text field: Personalized Text
- Upload Field: Upload Picture

How to add Clipart. Name the Option Tittle, then:
- Choose Clipart you created at step 2
- Or Add new category cliparts (If you add new clipart here, it can be used for this campaign only).

4.2 Layers: Upload file psd và Pick suitable Options at 4.1
- Step 1: Upload file PSD. BurgerPrints will automatically show layers of your design
- Bước 2: Map layer to product. Choose 4.1 Product Options
Example: Layer Right Girl Name will be Option Name1

4.3 Setting: Choose Mockup created at step 3
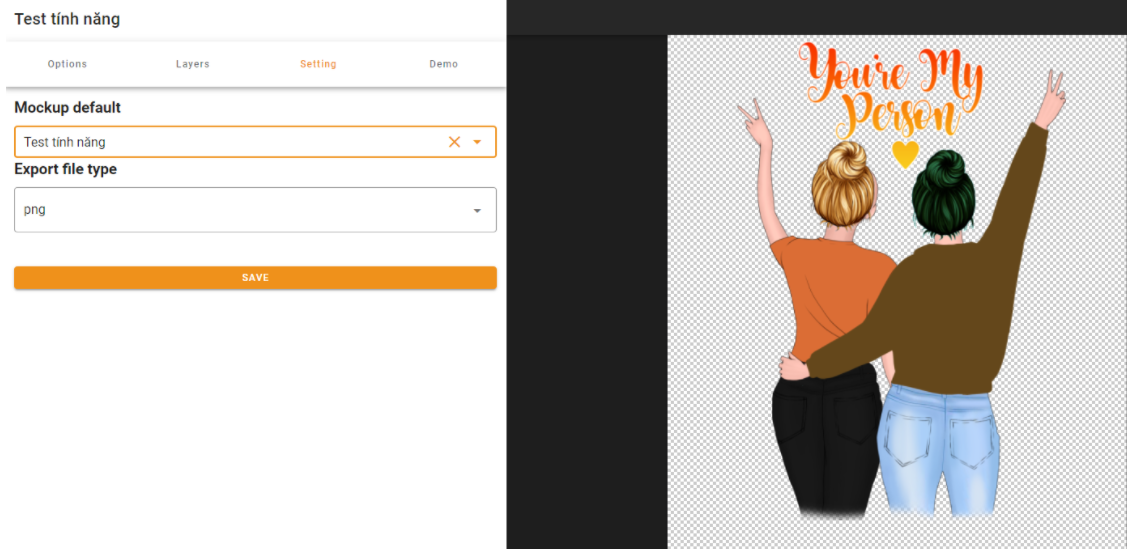
4.4 Demo: At this tab, you can test and adjust your personalized campaign.

Notes:
- In case the layers are overlapped, you just needs to click on the layers they want to put first, and choose Edit Position.
- With text layers, you should adjust text size more than 6000 px.